Fermented foods

By The Gut Health Doctor Team

Dr Megan Rossi in a lab looking through a microscope

With the fermentation craze growing fast, by now perhaps you’ve dabbled in kombucha or kefir – but what actually are fermented foods and what does the science say? Here’s the inside scoop on fermentation and the evidence behind the proposed health benefits.

What is fermentation?

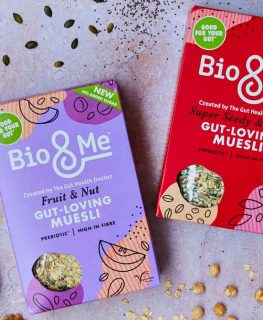
Fermentation is when bacteria and yeast ‘pre-digest’ food and drink, producing a range of vitamins, beneficial organic acids and other health-promoting compounds. Generally, anything that uses microbes to transform simple ingredients fits the ‘fermented food’ bill. They may have boomed recently, but fermented foods have been around for thousands of years! Some of my favourites include kombucha (fermented tea), kefir (fermented milk, or sugary water if you use water grains), live yogurt and sauerkraut (fermented cabbage).

The health benefits: where’s the evidence?

Traditional fermented foods are associated with a whole host of potential benefits, including increasing vitamin concentrations (such as folate and vitamin B12), reducing anti-nutrients, lowering blood pressure, supporting our immunity and having a calming effect. Fermenting may also lower gluten and lactose content in some sourdough bread and dairy, respectively.

Although I am a big fan of fermented foods and anecdotally, I’ve seen first-hand the physical and mental benefits of them, with my science hat on, I must declare the clinical evidence for most types is currently limited. The exception being fermented dairy, where there is decent evidence for the health benefits across heart health, bone health, digestion and weight management. The clinical evidence aside, our ancestors have been having fermented foods for thousands of years and associating them with benefit, not to mention they are so full of flavour. So yes high-quality clinical studies need to be done, but in the meantime I do recommend people include fermented foods into their daily diet.

They may also contain live microbes, although it’s worth noting that’s not the case for all fermented foods, as many die off in the processing.

Fermenting at home: a beginner’s guide

Despite the rumours, fermenting is surprisingly little effort – once you’ve prepared it, you just leave it and allow the microbes to do all the hard work. You can later return to a dish that’s transformed and ready to serve. Some fermented foods (such as kimchi or sauerkraut) do require more love and care, but there are plenty of time-efficient options, including kefir, yoghurt and my sourdough wraps (recipe in my book!).

Before you begin, I should also make you aware that, as with dietary fibre, going from a little to a lot too quickly could make some people extra gassy (while your inner community of microbes have a feast!) so it’s best to increase gradually. Chat to your GP first if you have a weakened immune system or are pregnant too.

My Favourite Kimchi Recipe from Love Your Gut

An iconic condiment in Korean culture, this ancient flavour bomb is said to be one of the secrets behind the Koreans’ long and healthy lives. Kimchi is known as a ‘wild ferment’ as it uses the microbes naturally found on plants and in the air (versus a culture-based ferment like kefir). I love kimchi with eggs (my favourite), salads or feta on crackers – the options are endless.

Equipment: 500ml glass jar with lid

Ingredients (Serves 8, 40g portions)

Base:

·       200g Chinese cabbage (or cabbage of choice)

·       25g sea salt (don’t worry, you won’t be eating this)

Toppers:

·       1 carrot (50g), grated

·       1 spring onion, diced

·       50g daikon radish, chopped into matchsticks

·       1 garlic clove, finely sliced

·       1 tsp ginger, grated

·       1 tsp gochugaru powder, OR 1/2 tsp chilli powder and 1/2 tsp paprika

·       1 tbsp tamari (or soy sauce)

Method

1.     Rinse the cabbage leaves under running water (to get rid of any residual soil) before chopping to the desired thickness.

2.     Put the cabbage and salt in a bowl. Firmly massage the salt into the cabbage.

3.     Pour 500ml of water, filtered or de-chlorinated, over the cabbage and submerge it by sitting a plate on top. Let it soak for 2 hours.

4.     Drain the soaked cabbage, and rinse three times to get rid of the excess salt. Squeeze out any excess water in the cabbage and place back in a bowl.

5.     Add all the topper ingredients and mix well, before transferring the mixture into a 500ml jar and, using your fist, punching down so there’s a layer of juice separating the raw kimchi and the air above.

6.     Place your glass weight or mini jar on top of the raw kimchi, making sure to submerge all the vegetables.

7.     Screw the lid on and leave at room temperature (ideally, 18–22°C), out of direct sunlight. Each day, check on your kimchi and release any gas that has built up by untwisting the lid a little to let it out.

8.     After 3 days (more in colder climates, less in warmer climates) your kimchi is ready for its first taste. If you’re missing that acidic bite, leave for an extra day or two.

9.     Once it’s reached your preferred flavour, pop it in the fridge with the lid sealed tight to trap in the gas, creating the fizziness of traditional kimchi. Leave it for 2 weeks to allow the flavours to develop – and enjoy!

Share

Related articles

The Gut Health newsletter shown on an iPad

Sign up for our free newsletter & gut health guide

Not sure where to start on your gut health transformation? Sign up for free and we’ll empower you every month with the latest educational blogs, gut-loving recipes, research updates and helpful resources delivered straight to your inbox. You’ll also receive a downloadable guide with an intro to gut science, practical advice and exclusive recipes. Lots of support and no spam.